 John Peart
A couple of years ago, I started making bots on Twitter for fun. My first bot was @IsItMeBot, and I documented how I made it back in January 2017.1 In this post, I’ll share how I made my second bot: @DeptOfAdmin.
The inspiration for this bot came from a binge-watching session of Yes, Minister – my second favourite politically-satirical TV show2. It’s a show full of masterful linguistic contortions that would make a Mandarin proud even today. At the centre of that show are the internal machinations of the Department of Administrative Affairs. I guess it’s kind of a pseudo-Cabinet Office3.
Having tinkered around with the HTML canvas and Twitter APIs, I started to wonder what the Department of Administrative Affairs might look like if it existed in 2017, rather than 1987. Almost certainly it would have a social media presence; most likely a Twitter account.
Sir Humphrey Appleby’s many, many witticisms were prime content for a bot. I decided that the @DeptOfAdmin bot needed to immortalise some of his famous words. I created a fictitious brand identity for the Department, and then I set about coding the bot.
Now, roughly once an hour, the Department of Administrative Affairs tweets something that looks like this:
Department of Administrative Affairs (@DeptOfAdmin)
March 29, 2020We invest in nuclear bunkers as a department. Administration won’t stop just because the country’s been destroyed! Annihilation will be bad enough without anarchy to make things even worse!
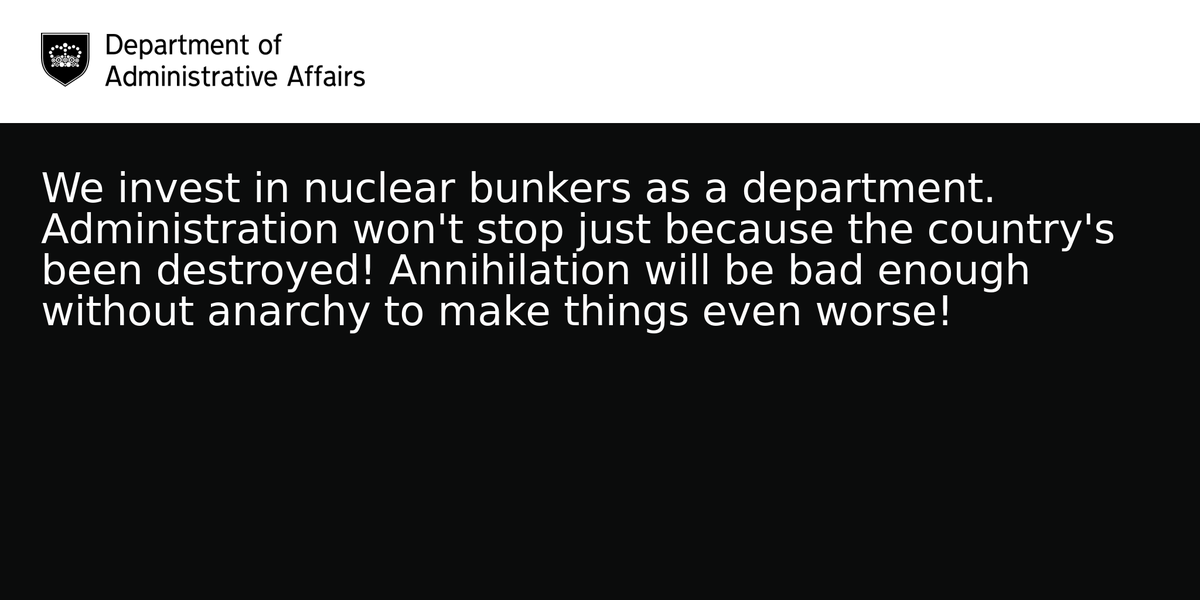
It takes a random quote from a pre-defined list, generates an image dynamically based on that quote, and then tweets the image and the quote as part of the tweet too.
I recently updated the bot to take advantage of the latest open source software, and to tweak the brand identity a little to match my upcoming podcast, the Department of Bad Ideas.

I’ve written a somewhat step-by-step of the process, if you wanted to create you own bot, below.
What this bot can do
These high-level instructions will help you to create a bot that:
- selects a random quote from a pre-defined list
- dynamically generates an image, based on the selected quote
- posts the quote as part of the tweet body text, alongside the generated image
Pre-requisites
If you want to create a bot like mine, this is what you’ll need:
- a Twitter account to tweet from (in my case, @DeptOfAdmin)
- a Github account
- a Heroku account
- a plain-text editor of your choice (I’ve recently been using the free and multi-platform Visual Studio Code)
- to have installed Node.js
- access to the command line or Terminal on your computer
Note that I use a Mac, not Windows. Some of the commands you’ll need to run in the command line on Windows might be slightly different to the commands I’d run on a Mac.
Setting up your code repository
To start, you will need somewhere to put the code and somewhere to execute it in the cloud.
Create a folder on your computer where you’ll store this project and initialise it as a git repository. You can do both these things in one go using the Github Desktop app. If you’d prefer to use the Terminal (I don’t!), you’ll need to use something like these commands:
# 1. Navigate to the folder you want to store the project in
% cd /your-folders/your-project-name

# 2. Initialise the repository
% git init
Next, publish the repository to Github. Again, it’s much more intuitive to do this in the the Github Desktop app, but you can do it in the Terminal too by following the instructions on Github’s help pages.
Create your Heroku app
With your repository set up on Github, you’ll need to create an app on Heroku next. If you’re going to be using Heroku a lot, and in particular if you’d prefer to use its git system, then you’re best off installing Heroku Toolbelt and using the Terminal to create your apps. Alternatively, you can just do it using the New button on the Heroku dashboard.
With your Github repository and Heroku app set up, set your Github repository as the ‘Deployment Method’ using the Heroku web interface4. This means that every time code is pushed to the repository on Github, it can be pulled in and built by Heroku. You can set Heroku up to do the deployment automatically, or you can disable that and do it manually if you’d prefer.
Accessing the Twitter API
With the code repository and hosting set up and linked together, next you will to register for access to the Twitter API. Make sure you’re logged in with the account you intend to tweet from and not your personal account.
The registration process has changed to get access to the Twitter API – it’s now a bit harder to get access to just tinker around – so I’ll skip setting up an account here. For the purposes of creating your bot, you’ll need to get a:
- consumer key
- consumer secret
- access token
- access token secret
You get those at the Twitter Developer site under the Apps section. You’ll need these to input into your Heroku app.
A timely reminder that you should not store passwords or API credentials in your Github repositories. If someone has your credentials, they can tweet from your account!
Put your credentials into Heroku
Visit the Settings tab for your Heroku app on their website. Under the Config Vars section add four key-value pairs. It doesn’t really matter what you call the ‘keys’ but the values need to match your Twitter credentials.
I’d suggest the following pairings:
| Key | Value |
|---|---|
consumer_key |
Enter your consumer key |
consumer_secret |
Enter your consumer secret |
access_token |
Enter your access token |
access_token_secret |
Enter your access token secret |
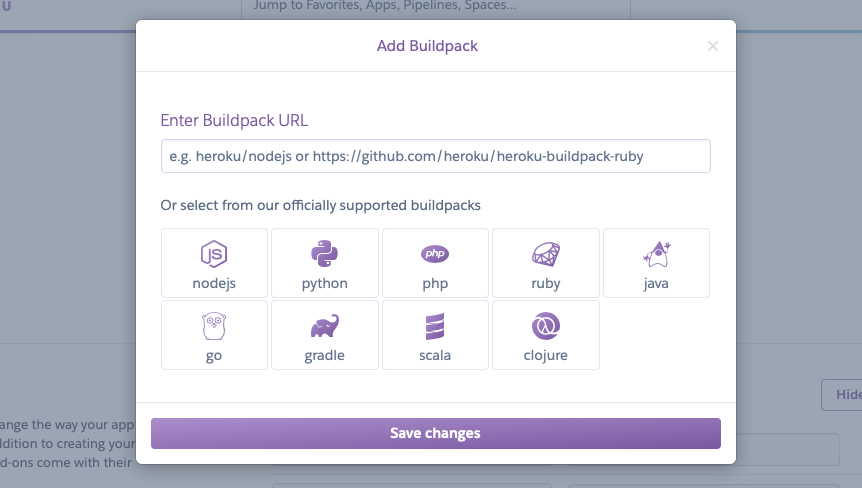
Add Buildpacks
Whilst you’re on the Settings tab, you may as well also set up your buildpacks. These are scripts that run when your app is deployed. They configure your hosting environment and install any software needed by your app to function properly.
This bot is built using a framework called twit, which relies on Node.js, so you’ll need to add that buildpack first. Select the Add buildpack button and then choose nodejs from the officially supported buildpacks.
In order to generate the images that our bot will tweet, you need access to the graphics library Cairo. There is no official buildpack for this library and its dependencies, but unofficial versions do exist. I’m currently using this one that’s been maintained by Sky. (Yes, the people who do broadband and TV). Select the Add buildpack button again, and enter the following URL:
https://github.com/sky-uk/heroku-buildpack-cairo.git
Sketch out your designs
Before you start coding, you should sketch out some designs for your graphics. This will help to simplify how you code your bot because it will give you an idea of dimensions and relative sizes of various elements.
The bot will generate images based on a compound of text, simple shapes and colours, or more complex imagery you provide. Sketching out your designs will help you figure out how you could reproduce the design in code too.
The @DeptOfAdmin bot generates its images in 4 stages. It:
- fills the whole canvas with a white background
- places an image in the top left of the canvas
- fills the area below the image with a random colour from a pre-defined list
- places the quote text over the top of the coloured area
All of this could be done entirely with code or entirely with images because this is a simple composition. Anything you can create with the HTML canvas API can be dynamically generated. For anything more complex it would likely be simpler to create images and to import them into the canvas instead. The @DeptOfAdmin bot uses a combination of the two.
As you’re sketching out your designs, make sure you have figured out the dimensions of each element as well the overall size of the image.
Twitter crops images to two main sizes; they are:
- landscape orientation rectangles of a maximum 1,200 pixels by 675 pixels
- squares of a maximum 1200 pixels by 1200 pixels
The @DeptOfAdmin bot creates images that are 1,200 pixels by 675 pixels so that all the text is displayed properly on Twitter’s mobile apps and on the web.
Any final image assets you create for import onto the canvas need be at least the same size as they need to be displayed on the canvas to avoid pixelation. They also need to take into account pixel density; so if you’re making a 1200 pixel by 675 pixel canvas and the canvas will output a 2400 pixel by 1350 pixel image – so it’s @2x size – then your assets also need to be @2x size.
Basic file structure
There are a few files you’ll want to set up:
package.json: to put your Node.js app information, dependencies and settingsserver.js: to put the main logic of your app (it doesn’t actually matter what it’s called, but this file will be referenced in yourpackage.json)
That’s the bear minimum you’ll need to make the bot. You might also decide to separate out a few extra bits into their own files, so that server.js is human-readable, as well as machine readable.
You should also create a /assets folder to store images and fonts you want to use in the bot.
Set up package.json
First we’ll create the package.json file. This file makes it easy to install and run your app on Heroku. The file:
- lists the packages your project depends on
- specifies versions of a package that your project can use
You can create this file manually, or you can use the Node.js package manager to create the file via the Terminal. The latter is the easiest way to get started. In the Terminal, navigate to your project directory and run:
% npm init
You will then be guided through the various options you’ll need to set up.
Aside from the questions that the questionnaire guides you through, there are some important things you’ll need to include. You may need to open the file in a text editor to do this.
The main setting tells the server which file stores the primary code for your bot. In the case of the @DeptOfAdmin bot, this was called server.js.
"main": "server.js"
You can create custom scripts that trigger various files and commands as part of package.json. This command is the one used by Heroku to start your bot. It doesn’t matter what keyword you choose; for @DeptOfAdmin I used start as the script keyword, and told it to trigger the server.js file.
"scripts": {
	"start": "node server.js"
}
There are several frameworks that are required to generate the images and post them to Twitter. They can only be installed thanks to the buildpacks you have already set up Heroku.
"dependencies": {
	"canvas": "2.6.1",
	"express": "4.17.1",
	"fs": "0.0.1-security",
	"grunt-cli": "^1.2.0",
	"path": "0.12.7",
	"twit": "2.2.11"
}
The version numbers here don’t matter too much; these were just the versions that were available when I last updated the app.
The full list of supported options for package.json can be found on the Node.js website and the package I created for the @DeptOfAdmin bot is on Github.
Creating the bot itself
To make it easier to understand each element of the bot’s code, I separated the processes and variables into various files. For the @DeptOfAdmin bot, I created:
server.js: the main file that executed when the bot is started, and draws in information fromconfig.js,quotes.jsandcolors.jsconfig.js: this file retrieves my Twitter API credentials from Heroku and authenticates the bot with Twitterquotes.js: this file stores the list of quotes that the bot can pick from to turn into an image at randomcolors.js: this file stores a list of colour codes that you can pick from at random as the background for the images
Connecting to the Twitter API
Let’s start with the config.js as it gets the boring stuff out the way. In this file, define a variable called config:
var config = {
	// API credentials will go here
}
This variable stores your Twitter API credentials. You don’t want to put our credentials into our repository – you don’t need to, because they’re stored in the Config Vars in Heroku.
To retrieve the credentials from Heroku, use can use process.env. followed by the name of the variable you want to retrieve from Heroku. That gives you code like this:
var config = {
  consumer_key:         process.env.consumer_key,
  consumer_secret:      process.env.consumer_secret,
  access_token:         process.env.access_token,
  access_token_secret:  process.env.access_token_secret
}
We then need to expose this variable to server.js so we can use it in that file. We can do this using module.exports, like this:
module.exports = config;
A big list of quotes and colours
The main reason for creating quotes.js and colors.js is that these lists could be pretty long, and it cleans up the code. For each file, we’re creating a variable and exposing it using module.exports again.
For quotes.js:
// Create the variable
var quotes = [
	// Enter a list of comma separated values for quotes
]

// Export it for use in server.js
module.exports = quotes;
For colors.js:
// Create the variable
var colours = [
	// Enter a list of comma separated values
	// Either hex codes or rgb() values work
]

// Export it for use in server.js
module.exports = colors;
Scaffolding server.js
server.js is the file that brings all these other files together, generates our images, packages them up and sends them off to be tweeted. The file:
- imports the relevant frameworks and modules
- imports font files
- sets variables for the quotes, colours and design elements
- initialises the canvas
- splits quote across multiple lines if it has too many characters in it
- generates the image to tweet
- compiles the tweet and posts it to Twitter
1. Importing the relevant frameworks and modules
Start by importing the required frameworks.
var 	Twit = require('twit'),
		fs = require('fs'),
		path = require('path')

const 	{
	registerFont,
	createCanvas,
	Canvas,
	Image
} = require('canvas')
twit is the framework that handles Twitter authentication and posting your tweets. fs and path will enable you to access the file system through javascript more easily. Simply creating a variable (var) and requiring the package is enough to get you going.
canvas is a bit more complex. It handles generating the images your bot makes. As the @DeptOfAdmin bot, uses custom fonts and images that need to be imported, registerFont and Image are required as part of the constant (const) that is created. Importing fonts (registerFont) must be done before the canvas is created (createCanvas) or the bot won’t work.
You already used module.exports to expose the variables from config.js, colors.js and quotes.js in those files. Now you can use the fs and path framework you imported to bring those modules into the file.
config = require(path.join(__dirname, 'config.js'));
quotes = require(path.join(__dirname, 'quotes.js'));
colors = require(path.join(__dirname, 'colors.js'));
2. Import font files
To use the custom fonts, you’ll first need to import them and then register them. First, create a function used to import the file.
// This function can be used to import fonts
function fontFile(name) {
	// Change '/assets/fonts' to wherever the font files are stored
	return path.join(__dirname, '/assets/fonts/', name)
}
The registerFont() function is part of the canvas package that you required at the start. Use it, in conjunction with fontFile() to import each font file.
registerFont(fontFile('font-file.ttf'), { family: 'font-family-name' })
The above code will read your font file and assign it a family name that is used when you draw the canvas image for your tweet. The @DeptOfAdmin bot uses a free font from Google Fonts called Bitter.
3. Set variables for the quotes, colours and design elements
In order to make production of your image easier, you may find it helpful to set variables for any design elements before you start coding the canvas itself. In the case of @DeptOfAdmin, I set the following variables:
// Pick a quote at random
var chooseQuote 	= quotes[Math.floor(Math.random()*quotes.length)];
chooseQuote is a random quote chosen from the list of quotes in the quotes.js module. Math.random generates a random floating point number between 0 and 1. That number is multiplied by the number of values in the quotes variable. Math.floor then rounds that number down to the next nearest integer.
// Pick a background colour
var chooseColor	= colors[Math.floor(Math.random()*colors.length)];
chooseColor does the same as chooseQuote, but it uses the colors.js module to pick from.
// Set sizes of the canvas
var canvasWidth = 1200;
var canvasHeight = 675;

// Set the padding
var canvasPadding = 40;

// Set the size of the full canvas, minus padding on each side
var canvasWidthPadding = (twitterWidth - (twitterPadding * 2));
var canvasHeightPadding = (twitterHeight - (twitterPadding * 2));

// Set text sizes and line heights
var canvasFontSize = 35;
var canvasLineHeight = 45;
All of these variables relate to the design of the canvas. These will differ for your bot — you don’t have to use them, I just found it easier to have all the variables in one place.
4. Initialise the canvas
To start to create your image that can be tweeted, you need to create a “canvas”. You can do this by creating a constant (const) and then using the createCanvas() function that is part of the canvas package imported earlier.
// Generate a blank canvas canvas
const 	deptcanvas = createCanvas(width, height)
		deptcanvas instanceof Canvas
The createCanvas function accepts two arguments – the width of the canvas, and the height of the canvas. (This is where the variables set above start to become useful!). This is the conceptual size of your image; the finished size will depend on any scaling you apply to it when you generate your image.
5. Split quotes across multiple lines
The HTML Canvas API does not support multi-line or wrapping text natively. Unless you know your text isn’t going to be wider than the image itself, you’ll need to create a function to split the text across multiple lines.
// A function to split longer quotes over multiple lines,
// for use as part of the canvas
function wrapText(ctx, text, x, y, maxWidth, lineHeight) {
	var words = text.split(' ');
	var line = '';

	for(var n = 0; n < words.length; n++) {
	  var testLine = line + words[n] + ' ';
	  var metrics = ctx.measureText(testLine);
	  var testWidth = metrics.width;
	  if (testWidth > maxWidth && n > 0) {
		ctx.fillText(line, x, y);
		line = words[n] + ' ';
		y += lineHeight;
	  }
	  else {
		line = testLine;
	  }
	}
	ctx.fillText(line, x, y);

}
This function should be used after you’ve set up your font styles and created any elements of your canvas you need to be displayed beneath that layer of text. The function accepts a number of arguments to function.
ctxis the canvas you’re working ontextis the text you need to split up (in this case it would be thechooseQuotevariable)xandyare the pixel coordinates for where to start printing the text onto the canvas5maxWidthdoes what it says on the tinlineHeightis the number of pixels to add toyoncemaxWidthhas been reached and you need to continue printing text on a new line
6. Generates the image to tweet
Now you’ll need to bring it all together.
Set the width and height of the canvas, using the variables you set earlier:
// Set the width and height of the canvas
deptcanvas.width = (canvasWidth);
deptcanvas.height = (canvasHeight);
Next start rendering the canvas itself. Start by telling the API that you’re drawing a 2 dimensional image.
// This tells the API that the canvas is 2 dimensional
var ctx = deptcanvas.getContext('2d');
Next start to draw in your elements. For the @DeptOfAdmin bot, I start with drawing a full size rectangle and fill the rectangle with the colour white.
// Creat a full size background fill in white
ctx.fillStyle = "#FFFFFF";
ctx.fillRect(0, 0, canvasWidth, canvasHeight);
ctx.fillRect() accepts 4 arguments:
- the first and second argument are the
xandycoordinates where the rectangle should start drawing - the last two variables are the
xandycoordinates where the rectangle should stop drawing
The @DeptOfAdmin bot next imports and renders an image (the Department of Administrative Affairs logo) over the top of that rectangle.
// Import the external image of the logo
// Position the logo at the top left of the canvas
img = new Image()
img.src = fs.readFileSync(path.join(__dirname, '/assets/', 'logo.png'))
ctx.drawImage(img, canvasPadding, (canvasPadding * 0.8), img.width / 2, img.height / 2)
The ctx.drawImage() command accepts 5 arguments:
- the first is what to import the image file itself (in this case, defined by
img) - the second and third are the
xandycoordinates of where to draw the image5 - the fourth and fifth argument are the width and height of the image – which you can make relative to the native size of the image using
.widthand.height
Next, the @DeptOfAdmin bot draws another rectangle, filled with the random colour set in the chooseColor variable. It draws from below the rendered logo to fill the remainder of the canvas.
// Create a rectangle and fill it with a the random colour chosen earlier
// Make the rectangle full width and draw it from underneath the logo to the bottom of the image
ctx.fillStyle = chooseColor;
ctx.fillRect(0, ((canvasPadding * 1.6) + (img.height / 2)), canvasWidth, (canvasHeight - ((canvasPadding * 1.6) + (img.height / 2))));
Finally, the @DeptOfAdmin bot sets the text styles and renders the text, utilising the wrapText() function created earlier.
// Add text
ctx.textBaseline="top";
ctx.font = canvasFontSize + "px 'Bitter'";
ctx.fillStyle = "#ffffff"

// If the random quote would be wider than the canvas width, break it over multiple lines
wrapText(ctx, chooseQuote, canvasPadding, ((canvasPadding * 1.6) + (img.height / 2) + canvasPadding), canvasWidthPadding, canvasLineHeight);
For the @DeptOfAdmin bot I wrapped all of this code in another function called createTwitterImage(). I then can call this function as many times as necessary as part of the final function in server.js – the sendTweet() function.
Full documentation for the canvas package is available on Github.
7. compiles the tweet and posts it to Twitter
The sendTweet() function relies almost entirely on the twit framework.
First, set a variable that holds your Twitter API credentials:
var T = new Twit(config);
Next, draw together everything from these files to make your bot tweet!
function sendTweet() {

	// call the function to draw the canvas
	createTwitterImage();

	// [OPTIONAL: Tweet the text from the image as part of the body of the tweet]
	// Check the character length of the quote, trim it if necessary.
	if ( chooseQuote.length > 270 ) {
		var tweetText = chooseQuote.substring(0,270) + "…";
	} else {
		var tweetText = chooseQuote;
	}

	// Post the tweet
	T.post('media/upload', { media_data: deptcanvas.toBuffer().toString('base64') }, function (err, data, response) {

		// Sets up references to the image and text
		var mediaIdStr = data.media_id_string
		var params = {
			status: tweetText,			// [OPTIONAL]
			media_ids: [mediaIdStr]
		}

		// Posts the tweet
		T.post('statuses/update', params, function (err, data, response) {
			console.log(data)
		})

	})

}
If you don’t want to tweet anything other than the image, you can skip the parts labelled as optional in the code above.
The full server.js file is on Github.
Deploy your bot
Commit your code to Github. It will then pull into Heroku and deploy the app.
Make the bird sing
There are two final things to do to make the bot work: making Heroku trigger the bot and scheduling it to do that at set intervals.
To make the bot run, you’ll need to visit Resources in the Heroku dashboard of your app. Create a “free dyno” and set it to run the same command that you set in your package.json file. It will be something like:
web npm start
Every time the bot is deployed, it trigger this command. You’ll probably want the bot to run on a schedule though. To do this, add the Heroku Scheduler add-on as well. Tell it to trigger at whatever interval you like; the @DeptOfAdmin bot runs every hour, on the hour.
That’s it!
That’s all you need to create your very own bot that works just like @DeptOfAdmin. All the source code from this bot is on Github; feel free to adapt it for your own purposes.
Footnotes
Twitter has now suspended @IsItMeBot, after around 2 years of it running amok on the platform and snapping back at random people with “it’s you”. Whilst it no longer exists, you can find it’s remnants scattered across Twitter with a quick search. Needless to say, some people found it hilarious, some found it offensive, and others couldn’t figure out it was a bot at all and thought someone had specifically been tweeting at them. ↩︎
My favourite is The Thick of It; possibly the best comedy ever written. I have watched it so many times I find myself quoting it in actual conversations with actual people as part of my actual job. As a related aside, it still surprises me how few civil servants pick up on it or, in fact, have even seen the The Thick of It. It should be required viewing as part of your induction if you ask me! ↩︎
Presumably the Cabinet Office itself does exist in the Yes, Minister universe, but having worked there myself it would appear there is a lot of administrative overlap between the Department and its non-fiction equivalent. ↩︎
You link your Github account to your Heroku account on the ‘Deploy’ page on the Heroku website. You can use the Heroku built in git system if you like; I just prefer using Github as all of my code is stored there. ↩︎
For the canvas coordinates, the origin of the grid starts in the top-left of the image. In this instance (0,0) would be in the top-left corner, (1200,0) would be in the top-right, and (1200,675) would be in the bottom-right. ↩︎ ↩︎